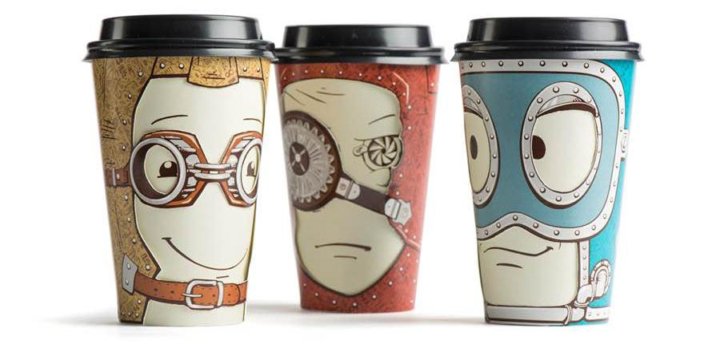
No More Mistakes with Flour Mill Machine Manufacturer
Mar 11 2023
Creating unique cup designs is a beautiful way to blend function with personal expression. Whether for artistic fulfillment or commercial purposes, learning the right art techniques can make your designs stand out. From sketching the first outline to applying a final glaze, each method brings your idea to life in a special way.
Hand-painting remains one of the most expressive ways to design cups. This method allows you to create free-flowing patterns, detailed images, or simple color blocks with a personal touch. The charm of hand-painting lies in its imperfections and uniqueness. No two painted cups are exactly the same, which makes them all the more special.
To start, always clean your ceramic surface thoroughly. Dust or grease can stop the paint from sticking. After that, sketch your idea lightly with a pencil. Use high-quality ceramic paints or underglazes. These paints are made to stick well to ceramic and survive high temperatures in the kiln. Make sure to use soft brushes for smooth strokes and fine brushes for details.
Color blending is important in hand-painting. Start with lighter colors, then move to darker ones. This gives depth to your design. Also, allow each layer of paint to dry before adding another. This prevents smudging and helps in keeping the design clean. To seal the design, the cup must be glazed and fired. This not only protects the paint but also gives the surface a glossy finish.
Practicing brush control is essential. Try different strokes and techniques like stippling or dry brushing. Over time, your skills will grow, and your designs will improve. Hand-painted cups have a charm that machine-printed ones cannot match. Each stroke tells a story, making every cup feel personal and unique.
Decal transfers offer a way to apply complex images or patterns to cups with designs easily. These transfers are printed using ceramic toner or special ink and then applied to the surface before firing. This method is ideal for replicating logos, photographs, or intricate line work that would be hard to paint by hand.
Start by preparing the cup surface. Make sure it’s clean and dry. Cut the decal close to the image, soak it in water for a few seconds, and then slide it onto the cup. Use a rubber squeegee or soft cloth to remove air bubbles. The decal must dry fully before firing.
Most decals need a lower firing temperature than glaze. Follow the temperature guide carefully. Overfiring can blur or burn the design. The result is a crisp, permanent image fused into the surface.
Artists often use decals alongside other techniques like hand-painting or stenciling. This adds depth and texture to the final piece. You can layer decals or mix them with patterns to build complexity.
Sgraffito is an ancient technique that involves scratching through a surface to reveal a different layer of color beneath. This technique works best on leather-hard clay. That’s the stage when the clay is firm but not fully dry. Artists apply a layer of colored slip (liquid clay) over the base. Once it dries slightly, they use tools to carve the design, showing the clay underneath.
This method gives a clean, sharp contrast between colors. It allows for very detailed patterns and often resembles woodcut prints. Use fine loop tools or needles for small details and larger loop tools for bold lines. You can create flowers, leaves, animals, or geometric shapes—whatever fits your artistic vision.
Before starting, plan your design on paper. Sgraffito is not forgiving, and once carved, changes are hard to make. Apply the slip in even layers to avoid uneven textures. Let it sit for a few minutes, but don’t let it dry out completely. The timing is crucial. Too dry, and it chips; too wet, and it smears.
The carved design needs to be smooth and clean. Use a soft brush to remove clay dust gently without smudging your lines. After carving, the cup needs to dry completely before the first firing. After that, apply a clear glaze to protect the design and give the cup a shiny finish.
Watercolor-style painting on ceramic gives a soft, flowing effect that looks elegant. It works best with underglazes that can be watered down. This technique is great for backgrounds, skies, abstract art, or floral patterns. It gives a dreamy look and allows for gentle color blending.
To begin, wet the ceramic surface slightly. This helps the color flow better. Use a soft brush and watered-down underglaze. Start from one edge and move your brush in smooth motions. Layering is key. Once the first layer dries, apply another for more depth. Make sure the layers are thin. This avoids cracking and keeps the surface smooth.
Control over water and pigment is essential. Too much water can cause the colors to run wildly. Too little water and the effect is lost. Practice with test tiles before applying it to your final cup. Try gradients from light to dark or mix two colors for interesting results.
Once dry, the cup should be glazed and fired. Glazing brings out the softness of the watercolor effect and makes it safe for use. Watercolor wash designs often suit modern, minimalist themes but can be combined with detailed art too.
Stencil art allows for clean, repeatable shapes and patterns. You can use pre-cut stencils or make your own from paper, vinyl, or plastic sheets. Masking is similar but covers parts of the cup to block out certain areas from paint or glaze.
The process starts with choosing a design. Attach the stencil to the cup using a low-stick adhesive. Apply paint, slip, or glaze using a sponge or airbrush. After drying, remove the stencil carefully. The result is a sharp-edged pattern or image.
You can reuse stencils many times, which makes this method great for sets. Combine different stencils or rotate them to create complex patterns. Use masking tape to divide sections of the cup and apply different colors or textures.
Some tips to improve results:
This method is excellent for artists who want control over shapes and patterns. It allows a mix of clean design and free-form expression when paired with other techniques.
Glazing is the final stage and one of the most critical. It not only seals and protects the cup but also defines the overall look. There are many types of glazes—glossy, matte, crackled, or speckled. Each adds a different character to the design.
Apply glaze with a brush, dip, or spray, depending on your desired effect. Brushing gives control but can leave streaks. Dipping is quick and even but needs careful handling. Spraying gives the smoothest finish, often used in professional studios.
Before glazing, make sure the surface is clean and dust-free. Even tiny particles can cause glaze defects. Apply two to three thin layers instead of one thick coat. This prevents runs or pooling at the base.
After glazing, fire the cup in a kiln at the recommended temperature. Cooling should also be gradual. Sudden changes in temperature can crack the glaze or even the cup.
Dot and line art is all about using simple elements to create visual complexity. You can create mandalas, patterns, or borders using just dots and lines. Use fine brushes, stylus tools, or even toothpicks to apply small dots of paint or slip.
Start with a basic outline using a pencil. Then fill the area with repeating dots or lines. The rhythm and spacing matter. Keep your hand steady and space the dots evenly. For lines, use a liner brush and thin paint for smooth flow.
This technique is ideal for adding texture and movement. Combine different sizes of dots to show depth. Use bold lines for borders and thin ones for inner details. Colors can also vary to create visual contrast.
Dot and line art looks great on cups with a simple base color. The design pops out more. It also matches well with geometric and tribal patterns.
Some of the most creative designs come from mixing several techniques. For example, you can hand-paint a floral image, use stencils for borders, and apply decals for detailed centerpieces. Mixing methods allows freedom and adds richness to the artwork.
Plan your layers well. Decide which technique goes first. For example, use watercolor wash as a background, then carve or stencil on top. Let each layer dry fully before adding another to avoid smudging or damage.
Use different textures, gloss levels, or finishes. A matte background with glossy line art creates contrast. Add metallic glazes or crackle effects to give a rustic or antique look.
Experimenting is key. Try out combinations on test pieces before finalizing your cup design. Write down your steps so you can repeat what works.
Mastering art techniques for cup design takes time and practice, but it opens a world of possibilities. Whether you're a beginner or an experienced artist, each method offers something new to explore. With creativity, patience, and attention to detail, you can turn ordinary cups into meaningful pieces of art.
Social Media Marketing Strategies for Beginners
Mar 14 2023
(0) Comments